Showing posts with label Hello. Show all posts

Hello with The Ton

Friday, May 12, 2017

Happy Friday friends. Today's card features a fun background stamp from The Ton. They have some beautiful images. I started by heat embossing the Peony Garden stamp and then did some ink blending with a couple colors of Distress ink. I added a die cut sentiment and some sequins and the card is finished.

I hope everyone is having a fabulous week and has a wonderful weekend. Crafty hugs!


DT Projects for TupeloDesignsLLC - 3 Cards

Saturday, April 8, 2017

Happy Saturday friends. Thanks for stopping by today. I have 3 cards to share with you today for TupeloDesignsLLC. They all use the beautiful Medallion Flower Builder stamp set from Neat & Tangled. 

Have you shopped yet at TupeloDesignsLLC? Dan adds new products to the store nearly daily and recently added lots of coloring mediums. And don't forget about FREE shipping no matter where you live - just make the minimum required purchase and your order will ship for FREE. (In the USA - there is no required minimum)

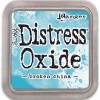
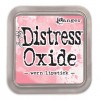
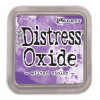
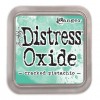
For my first card, I did some blending with my Distress Oxide inks. I used Broken China, Worn Lipstick, Wilted Violet and Cracked Pistachio.  I just love the background I was able to create.  I then arranged several of the images from the Medallion Flower Builder stamp set all onto my Misti at one time. I stamped them with a nice crisp black ink. Then sentiment is from that same stamp set. I then added some Nuvo drops as a final embellishemnt. They do match the card base a bit better than they are showing up in the photo.


For my second card, I left the images where they were in my Misti and this time, did a bit of heat embossing in white. I then flipped my card around so I could stamp the other corner. I then did a bit of ink blending, this time with just some regular Distress inks in Chipped Sapphire, Cracked Pistachio and Salty Ocean.

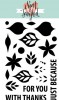
I stamped and die cut my sentiment from a Neat and Tangled set called Painted Hello. I decided that my panel would look better with some shimmer spray. Unfortunately, it made the ink move a bit strangely so I'm not completely loving how it looks now but that's okay. It's still a handmade card and one that I will be proud to send to a friend.


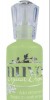
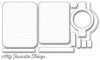
For my last card, I heat embossed those same images again. This time, I just used some Twisted Citron Distress ink and blended it so it would fade to light towards the bottom. One my panel was done, I die cut it with the large die from the Blueprints 31 die set from MFT. I added it with some foam tape and then added some Apple Green Nuvo drops to finish off the card.


If you've stuck with me for this whole post, a big thank you. I know that was a lot. I had so much fun playing with this set and am looking forward to using it again in a different way. Crafty hugs!


DT Projects for TupeloDesignsLLC

Thursday, February 16, 2017

Hi friends - thanks so much for stopping by today. I have two cards to share with you today for TupeloDesignsLLC. 

For my first card, I started by die cutting the Chevron Segments Cover-up die from MFT with red, coral and gold card stock. To adhere all the pieces, I added adhesive liberally to cover the card front taking care not to get any on the outside 1/8th of an inch or so. This made it really easy to add everything back in like a puzzle.  

I then heat embossed some of the images using gold embossing powder from Altenew's Hennah Elements stamp set. I used the coordinating dies to cut them out. 


For my second card, I took some of the other pieces that were left over from the Chevron Segments Cover-up die.  I then stamped and die cut the flowers which are from Altenew's Dahlia Blossoms set. A die cut sentiment and sequins finish off the card.


DT Projects for TupeloDesignsLLC

Tuesday, November 22, 2016

Hi friends. I have two cards to share with you today for TupeloDesignsLLC. All of my cards today use the absolutely beautiful Hello Lovely stamp set from Concord & 9th, from their latest release, which is available now for shipping from the store.

For my first card, I started by stamping the large floral image from the Hello Lovely with black ink. I then took Mermaid ink from Lawn Fawn and stamped the coordinating large flower image. I adore this floral image and how it takes up nearly an entire A2 card panel. It completely takes the design work out of the card. This would be a great card design to mass produce for a gift set. I will probably do just that.


For my second card today, I stamped the same large floral image, although this time with Onyx Black Versafine ink. After I stamped the image, I immediately poured some clear embossing powder over the image. I heat embossed this solely for the purpose of aiding in my water coloring. By embossing the image, it is easier to water color as the embossed lines help the colors from moving where you don't want them to go. I used my Zig Clean Color Real Brush Markers for this process.


Thanks so much for stopping by today. If you haven't yet checked out TupeloDesignsLLC, now is the perfect time to do so. They offer FREE shipping in the US with no minimum purchase and FREE shipping outside the US with a minimum purchase. Click here for all the details. You will also earn rewards points with each order.


DT projects for TupeloDesignsLLC

Friday, October 21, 2016

Happy Friday friends. I'm back again for TupeloDesignsLLC with two cards to share today using the beautiful Autumn Leaves stamps and coordinating dies from WPlus9.

On my first card, I started by taking the Stitched Arches Die-namics from MFT and die cut an arch into my card panel. I heat embossed my sentiment from a Wplus9 set onto the card base.I then stamped some of the leaves from the Autumn Leaves set with colored ink. I then took the outline image included in the set and heat embossed in gold. I then used the coordinating dies to cut them out. After all of this was done, I added foam tape to the back of my card panel and popped it up against the card base. I then added the stamped and die cut flowers.


On my second card, I started by die cutting some kraft card stock with the largest die from Lawn Fawn's Small Dotted Rectangle Stackables set.. I then stamped it with a background stamp from MFT.  I then stamped some of the leaves from the Autumn Leaves set with colored ink. I then took the outline image included in the set and heat embossed in gold. I then used the coordinating dies to cut them out. I added a die cut sentiment from the Hello There Die-namics set from MFT in gold foil card stock. I adhered it over some vellum. Sequins, foam tape and more gold foil card stock in the background finish off the card.


Declarations

I work with the following companies and do receive product from them to use on this blog on occasion; however, all opinions are my own and I would never promote anything or any store that I don't believe in

This Calls for Confetti


I also participate in several affiliate programs. If you click on links to those stores and make a purchase, I receive a small commission that is used in the costs of running this blog. Thank you for your support
Made With Love By The Dutch Lady Designs