Showing posts with label Whimsy Stamps. Show all posts

Having fun with Dinkles

Friday, March 1, 2024

Hello friends. I have a fun card to share with you today using some Dinkles Ink Powders from Lavinia. If you've never heard of these, they are very pigmented powders that react with water. 

To get started, I took a piece of watercolor card stock and added some Blueberry and Blue Dragon Dinkles powders on top of it. You just need a little bit. I then spritzed the panel with lots of water. I did this a couple of times, making sure to dry my panel in between. 

Once the panel was dry and I was happy with it, I die cut it using the Twinkle Swirl die from Whimsy Stamps. I then die cut the same die from some grey card stock. I added the colorful background to an A2 notecard and then inlaid the center portions of the grey piece in. I then took the Hello Word and Shadow die set and die cut both layers from the same grey card stock and added it on top of everything and that completes this fun card.
I hope you have a wonderful day. Thanks for your visit and crafty hugs! ~ Alanna 
  ***Affiliate links used for some products at no additional cost to you. Thanks for your support in running this blog***

Congratulations

Thursday, February 22, 2024

Hi friends. I have a fun card to share with you today. To get started on it, I took the frame image from the new Handmade Weirdo set from Whimsy Stamps and stamped it repeatedly with grey ink onto a white A2 notecard. 

I then took some Distress Mica Stain in the Wonderland color and sprayed just a bit onto it. I then took a piece of paper from the 6x6 Rainbow paper collection and die cut it using the Congratulations Word & Shadow die. I die cut the shadow portion from black card stock two times and then adhered them together. 

I added this to the card base and then added a supporting sentiment which is from the Simple Sentiment Strips stamp set. Some clear gems finish off the card. And then it was at this point that somehow, I got a big smudge on one of the sides with black ink. So, I trimmed both sides down a bit, so my card is now a bit smaller than the standard A2 size. :)

I hope you have a wonderful day. Thanks for your visit and crafty hugs! ~ Alanna
  ***Affiliate links used for some products at no additional cost to you. Thanks for your support in running this blog***

Expired but not Extinct

Monday, February 19, 2024

Hi friends. I have this fun and punny card to share with you today featuring the new Dino Mighties stamp set from the latest release at Whimsy Stamps. The images in this set are so stinking cute and the sentiments are also super cute.

To get started, I stamped one of the images onto a piece of white card stock and then colored it in with my Copic markers. I then stamped two of the sentiments below it. I die cut this panel using one of the dies from the A2 Antique Frames set. I then die cut a piece of black card stock using the next largest die from that same set.

I knew I wanted to add just a bit of something to my card base, so I took the Burlap Background stamp and stamped it with light grey ink. I then added my focal panel and that completes this fun card.


I hope you have a wonderful day. Thanks for your visit and crafty hugs! ~ Alanna 
  ***Affiliate links used for some products at no additional cost to you. Thanks for your support in running this blog***

Fairies and a new Release

Thursday, February 15, 2024

Hi friends. I'm back today with a fun slimline card featuring the new Fairy Land stamp set from the newest release at Whimsy Stamps that just hit the shop today.

To get started, I took a piece of white card stock and die cut it using the Polaroid die. I then took two of the center portions and stamped the same fairy in them. I took the outer portions and colored them with a purple Copic marker.

I then took a piece of paper from the Slimline Rainbow Magic paper pack and added it to a 3.5x8.5-inch card base. I then added on my frames and stamped a sentiment which is from the Fairy Land set.

I finished off the card by adding in some clear gems.
I hope you have a wonderful day. Thanks for your visit and crafty hugs! ~ Alanna***Affiliate links used for some products at no additional cost to you. Thanks for your support in running this blog***

Smile - Happy Birthday

Wednesday, February 7, 2024

Hello friends. I have a fun card to share with you today featuring a new die set from Whimsy Stamps.

To get started, I took the Fireworks stencil and blended on red ink through it directly onto my A2 notecard. I then die cut pieces from the new Fun With Words 1 die set with white card stock. I then die cut the backer die included in the set from white card stock. 

On those, I added red coloring to one of them and then blue coloring on the other three. I glued them all onto a piece of black card stock. I added this to my card and then finished it off with the stamped happy birthday sentiment which is from the Birfday Dragons set. Quick and easy!
I hope you have a wonderful day. Thanks for your visit and crafty hugs! ~ Alanna 
  ***Affiliate links used for some products at no additional cost to you. Thanks for your support in running this blog***

WTF? Oh Fer Cryin' Out Loud

Monday, February 5, 2024

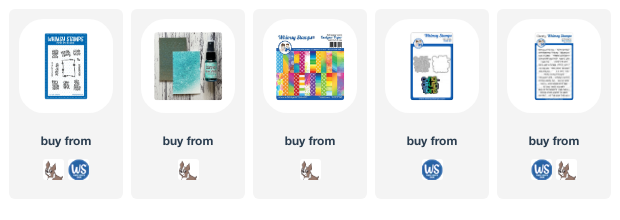
Hi friends. I have a fun card to share with you using the newer Dontcha Know set from Whimsy Stamps. I thought it would be fun to create an all over pattern, so I took one of the images and stamped it repeatedly onto a piece of white card stock using some dark grey ink.

Side note: This stamp set does have coordinating dies, but I am not using them on my card. They are linked below.

I die cut this panel using the largest die from the Zig Zag Stitched Rectangles die set. I added it to a red A2 notecard and then got to work on the rest of my card.

I took the WTF Word & Shadow die set, and die cut both layers. I added them to my card and then added a companion sentiment which is from the same Dontcha Know stamp set.
I hope you have a wonderful day. Thanks for your visit and crafty hugs! ~ Alanna
  ***Affiliate links used for some products at no additional cost to you. Thanks for your support in running this blog***

It's your Birthday! Sooo-weet!

Friday, February 2, 2024

Hello friends and happy Friday! I have a fun birthday card to share with you today featuring the recently released Piggies Crushed It stamp set from Whimsy Stamps. This set is so stinking cute and there are also coordinating dies and no-fuss masks available for it.

For my card, I started by stamping the image onto a piece of cream card stock. I then took the coordinating No-Fuss mask set for this and added the mask over top of my image. I love how easy this makes it to create scenes. After my image was masked, I added a piece of Post-It masking tape across the bottom inch or so to mask that off. I then took the Farmhouse Shiplap background stamp and tamped it with some light brown ink. I removed the post-it tape mask and added in my floor with some Copic markers. 

I then removed the mask from my little piggy and colored the image in with my markers. I die cut this panel using one of the Rounded Rectangle dies. I stamped my sentiment onto the panel which is included in the Piggies Crushed It stamp set.

I then took a cream A2 notecard and added some Distress Mica Stain over part of it to add some interest. I popped up my focal panel with foam tape and added it to the card and that completes this fun birthday card.


I hope you have a wonderful day. Thanks for your visit and crafty hugs! ~ Alanna 
***Affiliate links used for some products at no additional cost to you. Thanks for your support in running this blog***

2 Quick and Easy Gnome Cards

Thursday, February 1, 2024

Hi friends. As you can see, I am a bit slow going getting back into crafting and sharing. I have a few projects made and just need to find some extra time to get them blogged. :)  

But I do have a fun pair of cards for you today featuring the amazing new Gnome Wishes Quick Card Fronts from Whimsy Stamps. Each package comes with 8 A2 card panels along with a sheet of sentiments. 

For these cards, I took two of the panels and die cut them using the largest die from the Zig Zag Stitched Rectangles die set. I added them to white A2 notecards and then added on the sentiments which were popped up with foam tape. Both of these came together in less than 10 minutes. 

I absolutely love all the Quick Card Front that Whimsy Stamps has come out with. You can click here to see all of them in one place.


I hope you have a wonderful day. Thanks for your visit and crafty hugs! ~ Alanna 

  ***Affiliate links used for some products at no additional cost to you. Thanks for your support in running this blog***

Whimsy Stamps New Quick Front Card Panels - for Sympathy

Friday, January 5, 2024

Hi friends. Long time no see, right? I apologize for the long absence. We ended up moving my craft room to the downstairs of our house and boy was this a huge undertaking. I am up and running now though and am happy to be crafting in my new, slightly larger craft room. I hope that all of you had a wonderful holiday season and great New Year's. 

Whimsy Stamps has two new products releasing today, the Quick Card Fronts A2 Sympathy Bouquet set #1 and the Quick Card Fronts A2 Sympathy Bouquet set #2. In each package, you will receive a total of 8 different designs of the panels along with 2 sheets of sentiments, printed in toner ink.

These two new sets join the other three available in the shop currently. They make creating quick and easy cards a breeze. Click here to see all that are currently offered. 

For my first card, I am using the A2 Sympathy Bouquet set #1, which is all tones of purple. I started by adding some Distress Mica Spray Stain to my A2 card panel. I then took one of the panels from the set and die cut it using the largest die from the A2 Antique Frames die set. I added foam tape behind it and added it to my panel. I then took one of the sentiment panels and used one of the dies from the Simple Sentiments Strips die set, and die cut it out. I added it with foam tape and this card is complete.


For my second card, I did the exact same process except this time I kept my background plain. I used the A2 Sympathy Bouquet set #2 for this card. This set is all tones of blues.


I hope you have a wonderful day. Thanks for your visit and crafty hugs! ~ Alanna 


  ***Affiliate links used for some products at no additional cost to you. Thanks for your support in running this blog***

Have a N'ice One!

Monday, December 11, 2023

Hi friends. I have another card to share with you today using new products from the latest release at Whimsy Stamps

I am once again using the new Loopdidoos 2 die set along with the Birthday Cool stamp set. If you missed my first card using these products, click here.


I hope you have a wonderful day. Thanks for your visit and crafty hugs! ~ Alanna 

  ***Affiliate links used for some products at no additional cost to you. Thanks for your support in running this blog***

A Snowy Happy Birthday

Monday, December 4, 2023

Hi friends. I am back with a fun yet simple card featuring some new products from the latest release at Whimsy Stamps

For my card, I started by taking a piece of patterned paper from the Blurry Flurries paper collection and I trimmed it down to about 4x5.25 and then I die cut it using the largest die from the new Loopdidoos 2 die set. I then took that same die and die cut white card stock two more times. 

I adhered the outer pink portion to my white A2 notecard and then stacked the die cut frames and added those back in. I was left with the center portion which I stamped with an image from the new Birthday Cool stamp set. After it was stamped, I adhered it to the open part of my card front. Everything fit in like a puzzle.


I hope you have a wonderful day. Thanks for your visit and crafty hugs! ~ Alanna 

  ***Affiliate links used for some products at no additional cost to you. Thanks for your support in running this blog***

Heartfelt Sympathy

Friday, November 24, 2023

Hello friends. I have a pair of cards to share with you today featuring some previously released products from Whimsy Stamps. I needed some sympathy cards, so I got to work on these.

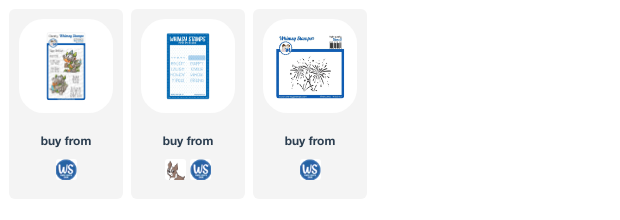
To get started, I took the Elegant Butterfly rubber cling stamp set and stamped it onto two pieces of white card stock with two shades of aqua ink. Note that while I didn't use it on these cards, this stamp does have a coordinating die available.  I used my Misti to do the double stamping. I started by stamping in the lighter color and then added the darker color around the edges and stamped again. I then stamped the sentiment which is from the Deepest Sympathy stamp set in grey ink. 

I trimmed these panels down and then added them onto panels of grey card stock that were trimmed slightly larger. Both panels were added to white A2 notecards and that completes these cards.


I hope you have a wonderful day. Thanks for your visit and crafty hugs! ~ Alanna
***Affiliate links used for some products at no additional cost to you. Thanks for your support in running this blog***

It's Beginning to look a lot like Cocktails

Tuesday, November 21, 2023

Hi friends. I'm back today with another card featuring the new Cocktails stamp set from the latest release at Whimsy Stamps. If you missed my first post using this set, click here.

For this card, I created my background the same way I created my first card using this set. I used the Juniper Berry and Frosty Mint colors of Distress Mica Stains. I then stamped one of the sentiments from the Cocktails set along with one of the images. I added just a bit of coloring to the image and then took the new Loopdidoos 1 die set and added the larger frame which was die cut twice for a little extra dimension. 

I added my panel with foam tape to a white A2 notecard and then decided my card needed just a bit more. So, I took the Cosmic Shimmer Fluffy Stuff and added it to the cuff on the image. Once it was added, I used my heat tool to heat it up and it adds the texture and dimension. If you've used Liquid Applique before, this is essentially the same product. 

I hope you have a wonderful day. Thanks for your visit and crafty hugs! ~ Alanna 


  ***Affiliate links used for some products at no additional cost to you. Thanks for your support in running this blog***

Hugs Shaker Card

Monday, November 13, 2023

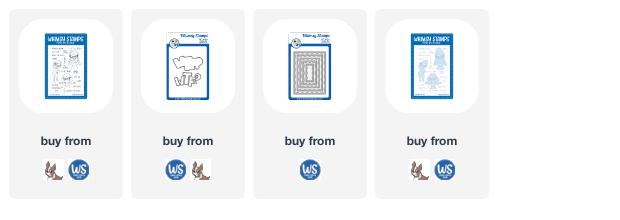
Hello friends. I have a fun shaker card to share with you today featuring products from Whimsy Stamps. To get started, I took a piece of patterned paper from the Retro Vibes 6x6 paper collection and trimmed it down to about 4.5.25 inches. I adhered that to a rust colored A2 notecard. 

I then die cut several of the largest frame dies from the Inverted Scallops Rectangle die set. I adhered about 5 of them together to build up my shaker walls. I added a layer of acetate trimmed to fit the die and then adhered that with double sided tape to the 5 die cuts that were added together. I then added one more of the die cuts over top of the acetate to hide the adhesive.

It was then time to fill my shaker card. I added some Iridescent Light Turquoise sequin confetti from This Calls for Confetti and added them directly on top of my patterned paper. I then adhered my shaker walls on top of the patterned paper and the shaker portion was complete.

I finished off the card by adding a die cut hugs sentiment on top of the acetate. This is part of the Big Hugs Word die set. I die cut the word 3 times for some added dimension.


I hope you have a wonderful day. Thanks for your visit and crafty hugs! ~ Alanna 

  ***Affiliate links used for some products at no additional cost to you. Thanks for your support in running this blog***

Whimsy Stamps New Release: Eat, Drink and be Merry

Friday, November 10, 2023


Hi friends. A brand-new release just hit the shop at Whimsy Stamps. I am using the new Cocktails stamp set.

To get started, I took two colors of Distress Mica Stains in the Frosty Mint and Juniper Berry colors and sprayed them onto my white A2 notecard. I then die cut the Slimline Observation Deck die. I took two of the fallout pieces and stacked them together two times. I then figured out where I wanted my images and sentiment to go, all from the new Cocktails stamp set.

I stamped them with black ink and then added my die cut frames around the drink images.
Here is some inspiration from the rest of the team!

I hope you have a wonderful day. Thanks for your visit and crafty hugs! ~ Alanna 
  ***Affiliate links used for some products at no additional cost to you. Thanks for your support in running this blog***

Whimsy Stamps Hot Foil Inspiration

Thursday, November 9, 2023

Hello friends and welcome back. I have two cards to share with you today featuring some hot foiling and lots of products from Whimsy Stamps. I absolutely love how these turned out, especially the first one. 

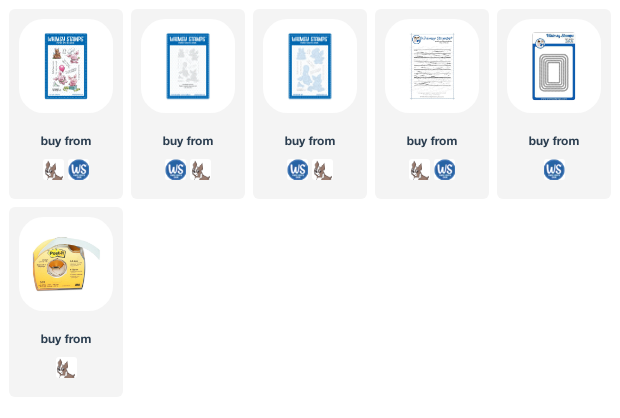
To get started, I took the Butterflies hot foil plate set from Whimsy Stamps and foiled it onto some light blue card stock using some Silver Holographic Speckle foil. Gah! I then used the coordinating dies to cut it out and also die cut two more butterflies from the same blue card stock to add behind for extra dimension.

I then took the Twinkle Cluster stencil and blended some grey ink on top of the same blue card stock. I then trimmed it down and added it to a piece of black card stock leaving a thin border on just two of the sides. This was then adhered to a white A2 notecard.

I stamped the sentiment which is from the Distant Friends set and then added my butterfly. I finished off the card by adding in some small confetti pieces.


For my second card, I used the same Butterflies hot foil plate set and the same foil but this time, I foiled onto black card stock. As with the first card, I die cut the butterfly using the coordinating dies and also die cut it two more times. 

I then took a piece of patterned paper from the Rainbow 6x6 paper collection and die cut it using the largest die from the Zig Zag Stitched Rectangles die set. I stamped a sentiment directly onto the patterned paper which is from the Distant Friends set. I adhered the patterned paper to a white A2 notecard and then added my butterfly onto it. I finished off the card by adding on a few die-cut stars.


I hope you have a wonderful day. Thanks for your visit and crafty hugs! ~ Alanna 
  ***Affiliate links used for some products at no additional cost to you. Thanks for your support in running this blog***

Declarations

I work with the following companies and do receive product from them to use on this blog on occasion; however, all opinions are my own and I would never promote anything or any store that I don't believe in

This Calls for Confetti


I also participate in several affiliate programs. If you click on links to those stores and make a purchase, I receive a small commission that is used in the costs of running this blog. Thank you for your support
Made With Love By The Dutch Lady Designs