Showing posts with label Christmas. Show all posts

Oh Christmas Tree for Whimsy Stamps

Wednesday, December 20, 2017

I'm back today with another Christmas card featuring Whimsy Stamps. Just a reminder that Whimsy Stamps still has its December sale going on all month long. Click here for all the details.

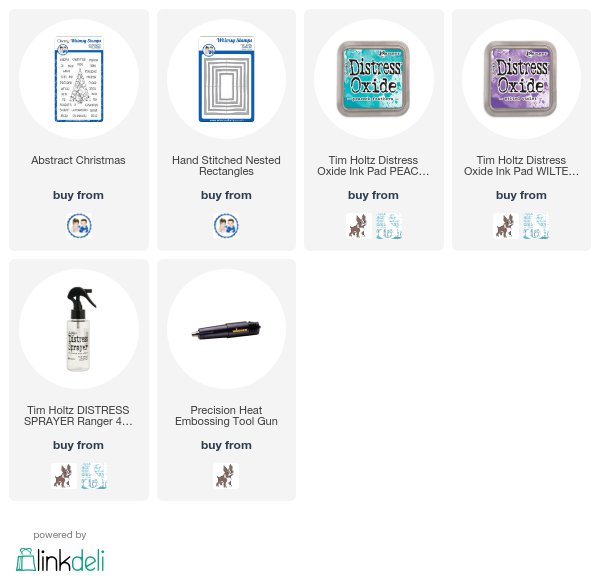
I started by heat embossing the super fun tree image from Abstract Christmas with white embossing powder.  I then added Wilted Violet and Peaccock Feathers Distress inks over top of it. I added some water droplets for added texture and interest.

I then die cut this panel with the 2nd to largest die from the Hand Stitched Nested Rectangles die collection.  I matted the panel with coordinating card stock layers and this card is done.

Thanks for visiting!


***Affiliate links used for some products at no additional cost to you. Thanks for your support in running this blog***

Happy Christmas to all for Whimsy Stamps

Wednesday, December 13, 2017

Welcome friends. I'm so glad you joined me today for this CAS Christmas card featuring Whimsy Stamps stamps and dies.  Make sure to read to the end of this post for information about a great sale happening in the store.

I started by die cutting the front of my card panel with the largest die from the Hand Stitched Nested Rectangle dies. I used a shimmery card stock to add a bit of extra interest to this otherwise very simple card.  I did want to point out that these dies, regularly priced $29.99 are currently also available in a holiday bundle along with a stamp set and 3 other dies for only $34.99.  Click here to check that out.

Now back to the card. I then stamped the Santa image and the sentiment which are from the Christmas Memories stamp set.  I finished off the card with some of the Christmas Cheer enamel dots from Whimsy Stamps.  I love that these are in a matte finish


I also want to remind you of the awesome sale going on in the store all month long. Click here for all the details.


***Affiliate links used for some products at no additional cost to you. Thanks for your support in running this blog***


Merry Christmas for Whimsy Stamps

Wednesday, November 22, 2017

Hi friends. I'm back today with a Christmas card using some fun products from Whimsy Stamps

Before I get to the card I do want to let you know that Whimsy Stamps is having a huge sale for Black Friday. All products will be 25% off and you can start shopping later today at 6 pm EST. 

Now back to my card - I started by die cutting some of the dies from the Christmas Branches die collection with the DIY Stencil Sheets. I love that you can basically create any stencil you want using your existing dies.

After my stencils were cut, I blended on some distress inks in red and greens onto my background panel. I then heat embossed the sentiment which is from the Scripty Occasions stamp set with gold sparkle embossing powder. I die cut the top and bottom of this strip with one of the dies from the Hand Stitched Borders die collection. I added it over some sparkly gold card stock and the card is done.

Thanks so much for stopping by today. Crafty hugs!


***Affiliate links used for some products at no additional cost to you. Thanks for your support in running this blog***


Christmas Greetings x 3 for Whimsy Stamps

Wednesday, November 15, 2017

Hi friends. I have three cards to share with you today, all using the super fun Abstract Christmas stamp set from Whimsy Stamps that was released earlier this year.

For my first card, I created my background using some various colors of Distress Inks that I smooshed into some water color card stock.  I then stamped and heat embossed the Christmas tree and the sentiment with some silver embossing powder.


For my second card, I did the same thing except this time with some various blue inks with some gold embossing powder. I also rubbed my Versamark ink pad down the edge of a white piece of card stock and then coated it with the same gold embossing powder. 


For my last card, I thought it would be fun to heat emboss the image onto some black card stock. I then took some metallic water colors and added just a touch to some of the circles in the tree. I also added heat embossing to the edges of my panel like I did in the card above.


I hope you've enjoyed these cards today. Thanks for dropping by. Crafty hugs!

***Affiliate links used for some products at no additional cost to you. Thanks for your support in running this blog***


Geometric Snowflake for Whimsy Stamps

Wednesday, November 8, 2017

Hi friends. Thanks for stopping by today. I have a fun card to share with you today for Whimsy Stamps.  I started out by making my background using some Color Burst powders. I can't seem to stop using these as I love what you can do with them.

After my background was complete, I took the Geometric Snowflake from Whimsy Stamps and die cut it from the panel. The die cuts the outline and all of the individual star pieces on the inside. I die cut the die again, this time with just plain white card stock for the outline.

I added all the pieces back in. To do this easily, I adhered lots of adhesive to my card panel and just fit everything back in.  Luckily, the inner portions of my snowflake die stayed together for the most part so it was really quick and easy to fit all back together.

I finished off the card with a simple sentiment and some black and white twine.

Thanks for your visit. Crafty hugs!


***Affiliate links used for some products at no additional cost to you. Thanks for your support in running this blog***

October Whimsy Stamps Release Day

Saturday, October 7, 2017

Welcome friends. It's the Whimsy Stamps release day and all the new products we've been showing you the last week are now available in the store now.

Before you go shopping, I have 3 cards to share with you today.

For my first card, I took various colors of Color Burst powder in blues and purples and created this fun background. After my panel was dry, I then white heat embossed the beautiful Snow Flurry Background onto it.  I finished off the card with an embossed greeting from Abstract Christmas along with some sequins.


For my second card, I used the Snow Flurry stamp set and gold heat embossed some of the images and a sentiment onto a background that I made using some various Distress inks in shades of blue. I'm sorry for the poor photo. I was having a hard time with the glare at the bottom.


For my last card, I started by heat embossing some water color card stock with the Snow Flurry Background set. I then sprayed the panel and added various shades of gold paints.  I heat embossed the focal image from the Peace Joy Love stamp set onto some vellum and then added it over a circle cut the same size of white card stock. Some twine finishes off the card.


***Affiliate links used for some products at no additional cost to you. Thanks for your support in running this blog***


October Whimsy Stamps Release Day 4

Wednesday, October 4, 2017

Welcome friends - I hope you are having a great week so far. It's day 4 of the October Whimsy Stamps release and I have the privilege of showing you the Oh Holy Night stamp set. This is a beautiful stamp set with gorgeous images and sentiments.

For my card, I made my first ever galaxy night background. I thought it would go nicely with the images and the sentiment.

I created my background using several colors of Distress inks. I then added black Distress ink over everything, allowing just a bit of the colors to peek through.  I then splattered some white paint over my background.

When this was all dry, I stamped my images and the sentiment and the card is complete.


October Whimsy Stamps Release Day 3

Tuesday, October 3, 2017

Hi friends and welcome to day 3 of the October 2017 Whimsy Stamps release. All the new products will be available starting on October 7th.

I am showcasing the beautiful new St. Nicholas stamp set today. I love the fun Santa image in the set.  For my card, I started by stamping my Santa and then I did a bit of masking with this pen. After it was dry, I blended on some various Distress Inks for my background.  I now removed the masking fluid and got to work coloring the image with my Copics. You can see that I got a little heavy handed with the cuff on Santa's hat. It's a lot more grey than I would have liked. 

I stamped one of the sentiments from the stamp set onto my card panel and then die cut the whole thing with the largest A2 size of the Hand Stitched Nested Rectangles.

I hope you'll join me back here tomorrow for day 4 of the release. Crafty hugs!


Whimsy Stamps September Release Day #4

Monday, September 4, 2017

It's day 4 of the September Whimsy Stamps release and I have one card and a set of two tags to share today.

My card today uses the beautiful news Abstract Christmas stamp set. It has a beautiful tree image and lots of sentiments.  I thought it would be fun to stamp the tree repeatedly for a fun geometric look. After my stamping was done, I trimmed down both sides of my stamped panel removing the stump part of the tree. I added a die cut vellum piece with one of the Christmas Branches dies and added my stamped sentiment over top that. 


For my second project I created two gift tags using the super cute Oh What Fun stamp set. I stamped a couple of the fun images along with a sentiment from the same set. I did some real basic Copic coloring, added some twine and the tags are done.


Here is a close-up of all the fun products being introduced on the Whimsy blog today.


Thanks so much for stopping by today. And I hope my US friends have a wonderful Labor Day. Crafty hugs!


Christmas Card Challenges #13

Sunday, May 21, 2017

Hi friends. My card today is for the new challenge over at Christmas Card Challenges. For this challenge, there is a great word prompt of wreath.

I started by using my Misti to stamp the gorgeous Nordic Stripes background stamp from Impression Obsession.

I then stamped and die cut the wreath from WPlus9's Woodland Wreath stamp set. I love all the layering possibilities. I stamped the sentiment from MFT's Holiday Subway Art stamp set and then added my wreath with foam tape. I rounded the corners and added some sparkling clear sequins from Pretty Pink Posh and my card is complete.

As always, thank you so much for visiting today. Crafty hugs!


Declarations

I work with the following companies and do receive product from them to use on this blog on occasion; however, all opinions are my own and I would never promote anything or any store that I don't believe in

This Calls for Confetti


I also participate in several affiliate programs. If you click on links to those stores and make a purchase, I receive a small commission that is used in the costs of running this blog. Thank you for your support
Made With Love By The Dutch Lady Designs